


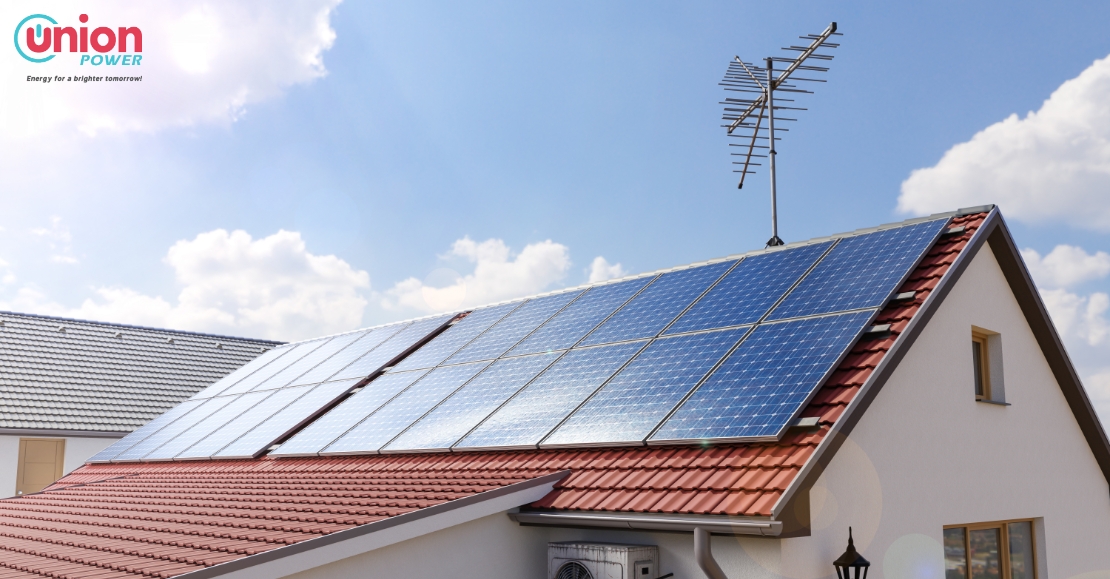
In today’s world, the importance of renewable energy sources cannot be overstated. With the negative effects of fossil fuels on the environment becoming increasingly evident, more and more people are turning to alternative energy options such as solar power. However, the installation process for solar panels can seem daunting and overwhelming for those who are new to it. That’s why we have put together this step-by-step guide to help you navigate through the process with ease. Whether you’re looking to reduce your carbon footprint or save on energy costs, this article will provide you with all the necessary information to successfully install solar panels on your home or business.
Planning to go solar: What to know before you install your panels
Going solar can be a great way to reduce your carbon footprint, save money on your electric bill, and become more energy independent. However, before you dive into installing solar panels on your home, it’s important to do some planning and research. In this step-by-step guide, we’ll walk you through the key things you should know and do before installing solar panels.
Understanding your electric bill
The first step in planning for solar is to understand your current energy usage and costs. Take a look at your electric bill and note the average monthly kilowatt-hour (kWh) usage and the cost per kWh. This will give you an idea of how much electricity you currently use and how much you are paying for it. It’s also helpful to look at your energy usage over the past year to get a better understanding of your seasonal variations.
Knowing your current usage and costs will help you determine how many solar panels you will need and how much you can potentially save by switching to solar.
Determine if your home is structured for solar
Before you invest in solar panels, it’s important to make sure your home is structurally suitable for them. Solar panels are typically installed on the roof, so you’ll need to have a roof that is strong enough to support the weight of the panels, as well as receive enough sunlight throughout the day. Even if your roof is not ideal for solar, there are other options such as ground-mounted panels or community solar programs.
It’s also important to consider the age and condition of your roof. If your roof is due for replacement in the near future, it may be more cost-effective to have the panels installed at the same time as your roof replacement.
Explore incentives and rebates
Solar incentives and rebates can significantly reduce the cost of installing solar panels. Depending on where you live, there may be federal, state, or local incentives available. Do some research to see what incentives are available in your area and make sure to take them into account when calculating the cost of your solar panel system.
In addition to incentives, some states have net metering policies that allow homeowners to receive credit for the excess energy their solar panels produce. This means that if your solar panels produce more energy than you use, you can sell it back to the grid and receive a credit on your electric bill.
Compare quotes and choose an installer
Once you have a good understanding of your electric bill, your home’s suitability for solar, and available incentives, it’s time to start getting quotes from solar installers. It’s recommended to get quotes from at least three different installers and compare them based on cost, quality of equipment, and warranty.
Make sure to ask the installers about their experience and certifications, as well as any warranties or guarantees they offer. You should also ask for references from previous customers to get a better understanding of their installation process and customer satisfaction.
After comparing quotes and researching the installers, choose the one that best fits your needs and budget. They will work with you to design and install a solar panel system that meets your energy needs and maximizes your savings.
Types of solar installations
There are two main types of solar installations: grid-tied and off-grid.
Grid-tied: This is the most common type of solar installation where solar panels are connected to the electric grid. This allows homeowners to use solar energy during the day and switch to the grid at night or in times of high energy demand. Grid-tied systems also allow for net metering, which can save homeowners money on their electric bills.
Off-grid: These installations are not connected to the electric grid and require battery storage to store solar energy for use at night or on cloudy days. This type of installation is typically used in remote areas where connecting to the grid is not possible or cost-effective.
There are also options for installing solar panels on homes that are rented or have limited roof space, such as community solar programs or solar leasing.
In conclusion
Installing solar panels on your home is a great way to reduce your reliance on fossil fuels and save money on your electric bill. However, it’s important to do some planning and research before making the investment. Understanding your electric bill, ensuring your home is suitable for solar, exploring incentives and rebates, and choosing the right installer are key steps in the process. With the right planning and installation, you can enjoy the benefits of clean and renewable solar energy for years to come.
The 5 Steps of a Home Solar Panel Installation
Installing solar panels on your home can be a daunting task, but with proper planning and guidance, it can be a smooth and rewarding process. In this step-by-step guide, we will walk you through the five essential steps of a home solar panel installation.
1. Engineering Site Visit
The first step in installing solar panels on your home is to schedule an engineering site visit. This visit is conducted by a professional solar installer to assess your home’s roof and determine the best design and layout for your solar panel system. During this visit, they will also evaluate the sun exposure and shading on your property, as well as any potential structural or electrical challenges that may need to be addressed.
2. Permits and Documents
Before any work can begin, you will need to obtain the necessary permits and documents for your solar panel installation. This usually includes building permits and approvals from your local government and utility company. Your solar installer can assist you with this process, but it’s essential to make sure all the necessary paperwork is in order before proceeding with the installation.
3. Ordering Your Solar Panels, Inverters, and Other Equipment
Once the permits and documents are in place, it’s time to order the solar panels, inverters, and other equipment needed for your system. Your solar installer will work with you to determine the best equipment for your specific needs, taking into account factors like your energy usage, budget, and available roof space. Once the equipment is ordered, it typically takes a few weeks for it to arrive.
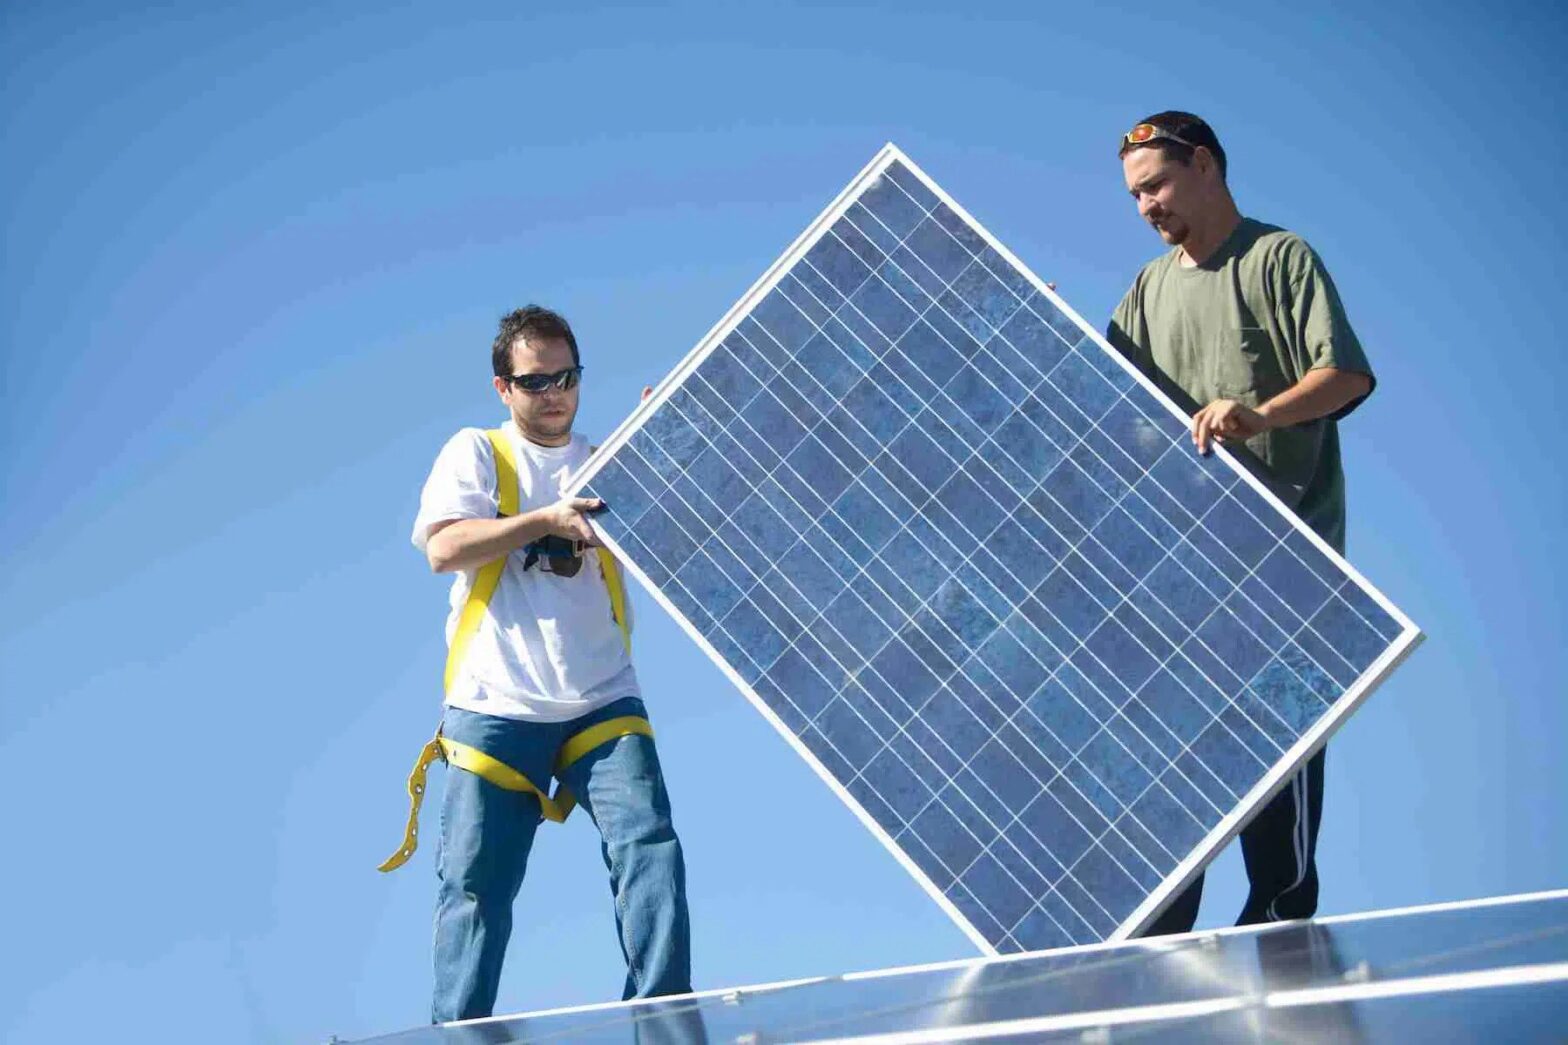
4. Solar Installation: The Big Day
The day of solar installation is an exciting one, as it marks the beginning of your journey towards energy independence. The solar installers will arrive at your home with all the necessary tools and equipment to begin the installation process. They will start by mounting the racking system on your roof, which will provide a sturdy foundation for the solar panels. Then, the panels are carefully placed and secured onto the racks, followed by the installation of the inverters and other electrical components.
How do installers attach the panels to your roof?
The solar panels are attached to your roof using a variety of methods, depending on the type of roof you have. For asphalt shingle roofs, the panels are typically attached using special brackets and clamps that are secured onto the rafters. For tile roofs, the installers will need to use specialized equipment to avoid damaging the tiles. For metal roofs, the panels can be attached directly onto the metal using special clips.
5. Approval and Interconnection
After the installation is complete, your solar installer will conduct a final inspection to ensure everything is installed correctly and meets all safety and building codes. Once approved, they will work with your utility company to interconnect your solar panel system to the grid. This step allows you to start producing your own clean energy and potentially earn credits for any excess energy your system produces.
In
The process of installing solar panels on your home may seem overwhelming at first, but by following these five essential steps, you can make the process more manageable and ensure a successful installation. Don’t forget to also research any available incentives or tax credits that may help offset the cost of your solar panel installation. With proper planning and professional installation, you can enjoy the benefits of renewable energy for years to come.

Can you install solar panels yourself?
The short answer is yes, you can install solar panels yourself. However, it is important to note that installing solar panels is a complex process that requires certain technical skills and knowledge. It is not something that can be done by just anyone without any prior experience or training.
Before you decide to install solar panels yourself, it is essential to assess your DIY skills and knowledge. If you have experience in working with electrical wiring, familiar with construction and roofing, and have some understanding of solar technology, then you may be able to handle the installation process. However, if you are not confident in your abilities or do not have the necessary background, it is best to hire a professional installer.
Even if you have the skills and knowledge to do it yourself, there are still certain factors to consider before proceeding with the installation process:
1. Budget: Installing solar panels can be quite expensive, so it is essential to assess your budget and determine if you have enough funds to cover the cost. Keep in mind that the cost will not only include the panels themselves but also other equipment, such as inverters, wiring, mounting hardware, and installation tools.
2. Roof condition: Your roof should be in good condition before installing solar panels. If your roof is old or needs repairs, it is best to address these issues first before proceeding with the installation. This will ensure that your solar panels will have a sturdy and stable base.
3. Permits and regulations: Before installing solar panels, you will need to obtain permits from your local authorities and ensure that you comply with any regulations or codes in your area. This may include obtaining building permits and following specific safety guidelines.
4. Location and weather: It is also crucial to consider your location and the weather conditions in your area. If you live in an area with a lot of shade or severe weather, it may not be ideal for solar panels. Additionally, some areas may have restrictions on where solar panels can be installed, so it is essential to research and familiarize yourself with any limitations in your location.
5. Size and type of system: Before purchasing solar panels, you will need to determine the size and type of system that is suitable for your energy needs. This will depend on factors such as your average energy consumption, the available space on your roof, and your budget.
Once you have considered these factors and have decided to proceed with the installation yourself, here is a step-by-step guide to help you:
Step 1: Gather all necessary equipment and tools: Before starting the installation process, make sure you have all the necessary equipment and tools. This may include solar panels, mounting hardware, wiring, inverters, and safety equipment.
Step 2: Measure and plan the placement of the panels: Measure the available space on your roof and plan the placement of your panels accordingly. Make sure to consider any obstructions, such as vents or chimneys, and leave enough space between each panel for optimal performance.
Step 3: Mount the panels: Attach the mounting hardware to the roof using bolts and screws. Make sure to follow the manufacturer’s instructions and ensure that the panels are securely attached to the roof.
Step 4: Install the wiring and inverters: Run the wiring from the panels to the inverters and connect them according to the manufacturer’s instructions. It is recommended to hire an electrician for this step if you are not confident in your electrical skills.
Step 5: Connect the panels: Once the wiring and inverters are installed, connect the panels to the inverters. Make sure to follow the manufacturer’s instructions and ensure that all connections are secure.
Step 6: Test and configure the system: Once everything is connected, test the system to ensure that it is working correctly. You may need to adjust the angle of the panels to optimize their performance.
Step 7: Secure and seal the panels: Once everything is in place, secure the panels to the mounting hardware and seal any gaps or holes to prevent water damage.
Step 8: Obtain necessary inspections and approvals: Once the installation is complete, make sure to obtain any necessary inspections and approvals from your local authorities to ensure that your system complies with all regulations.
While installing solar panels yourself may seem like a daunting task, it is possible with the right skills, knowledge, and precautions. However, if you are unsure or uncomfortable with any step of the process, it is always best to hire a professional to ensure a safe and efficient installation.
Frequently Asked Questions About Solar Panel Installations
Installing solar panels may seem like a daunting task, but with the right knowledge and tools, it can be a straightforward process. Here are some frequently asked questions about solar panel installations:
1. Do I need a professional to install my solar panels?
While it is possible to install solar panels yourself, it is highly recommended to hire a professional for the job. They have the necessary expertise and equipment to ensure a safe and efficient installation. Plus, professional installers may also be able to provide maintenance and warranty services.
2. How do I choose the right solar panel for my home?
There are a few factors to consider when choosing a solar panel for your home. These include the energy needs of your household, your budget, and the available space for installation. It’s best to consult with a professional to determine the best solar panel for your specific needs.
3. How long does it take to install solar panels?
The installation process may vary depending on the size of the solar panel system and the complexity of the installation. Typically, it takes one to three days for a professional installer to complete the installation. Factors such as weather conditions and accessibility to the roof may also affect the timeline.
4. What type of roof is suitable for solar panel installation?
Most types of roofs, such as asphalt shingle, metal, and tile, are suitable for solar panel installation. However, the condition of the roof is also a crucial factor to consider. If your roof needs repairs or replacement, it’s best to do it before installing solar panels to avoid any future complications or additional costs.
5. Do I need to upgrade my electrical panel for solar panel installation?
In most cases, solar panel installation does not require an upgrade to the electrical panel. However, if your current electrical panel is old or insufficient, it may need to be upgraded to accommodate the additional power load from the solar panels.
6. Do I need to obtain any permits for solar panel installation?
Yes, you will need to obtain necessary permits from your local government before installing solar panels. These permits ensure that the installation meets safety and building codes. Your solar panel installer can help you with the permit process.
7. How do I maintain my solar panel system?
Solar panels require minimal maintenance, but it’s essential to keep them clean for maximum efficiency. Regularly cleaning the panels with water and a mild detergent can help remove any dirt or debris. It’s also recommended to have your solar panel system inspected by a professional every few years to ensure everything is functioning properly.
8. Will solar panel installation increase my home’s value?
Yes, solar panel installation can increase your home’s value. Studies have shown that homes with solar panels have a higher resale value compared to those without. Additionally, solar panels can also reduce your overall energy costs, which can be an attractive selling point for potential buyers.
9. How long do solar panels last?
Most solar panel systems have a warranty of 25 years. However, with proper maintenance, solar panels can last for more than 30 years. It’s essential to work with a reputable installer and choose high-quality panels to ensure their longevity.
10. Can I add more solar panels to my system in the future?
Yes, it’s possible to add more panels to your existing solar panel system. However, it’s crucial to consider the capacity of your current system and the compatibility of the new panels. Consulting with a professional installer can help determine the best approach for your specific system.
By understanding the installation process and addressing any concerns or questions you may have, you can make an informed decision about installing solar panels for your home. With the rising cost of energy and the increasing focus on renewable sources, solar panel installation can be a wise investment for your home and the environment.
1. What are the necessary materials and tools needed for installing solar panels?
To successfully install solar panels, there are several necessary materials and tools needed. These include:
-
- Solar panels
-
- Mounting hardware
-
- Inverter
-
- Racking system
-
- Wires and cables
-
- Grounding equipment
-
- Disconnect switches
-
- Junction boxes
-
- Roof sealant
-
- Ladder or scaffolding
-
- Drill and drill bits
-
- Screwdriver
-
- Caulk gun
-
- Wire cutters
-
- Wire strippers
-
- Tape measure
-
- Level
-
- Safety equipment (gloves, goggles, etc.)
It is important to ensure that all materials and tools are of good quality and meet safety standards. This will ensure the proper and safe installation of the solar panels.
2. Do I need to have any special skills or training to install solar panels myself?
No, you do not necessarily need any special skills or training to install solar panels yourself. However, it is recommended to have a basic understanding of electrical work and home construction. Familiarity with tools and safety precautions is also important. If you are not confident in your abilities, it is best to hire a professional to ensure the panels are installed correctly and safely. Additionally, some jurisdictions may require a contractor’s license or specific certifications for solar panel installation. It is important to research and comply with any regulations in your area before beginning the installation process. With proper research and preparation, it is possible for most individuals to successfully install solar panels themselves.
3. What type of roof is best for installing solar panels and how do I determine if my roof is suitable?
To determine the best type of roof for installing solar panels, you will need to consider a few factors. The first factor is the orientation of your roof. Ideally, a south-facing roof with minimal shade is best for solar panel installation as it receives the most sunlight throughout the day. The pitch or slope of your roof is also important as it affects the efficiency and effectiveness of the panels. Generally, a roof with a pitch between 15-40 degrees is suitable for solar panels.
In addition to orientation and pitch, you will also need to assess the material and condition of your roof. Most solar panels can be installed on a variety of roofing materials such as asphalt shingles, metal, tile, or even flat roofs. However, if your roof is older or in need of repair, it may not be the best fit for solar panels as they require a stable and secure surface for installation.
To determine if your roof is suitable for solar panel installation, it is recommended to consult with a professional solar installer. They will be able to assess your roof and provide expert advice on the best placement and type of panels for your specific roof. Keep in mind that the size and location of your roof may also impact the number and placement of panels. It is always best to consult with a professional to ensure the most efficient and effective installation of solar panels on your roof.
4. Are there any permits or paperwork required before installing solar panels?
Permits and Paperwork for Installing Solar Panels
Before beginning the installation process for solar panels, it is important to research and understand the necessary permits and paperwork that may be required. The specific requirements may vary depending on your location and the type of solar panel system you plan to install.
One of the first steps should be to check with your local government and/or homeowner’s association to see if there are any specific regulations or restrictions for solar panel installations. Some areas may require a building permit or a special zoning permit before installation can take place. It is crucial to obtain all necessary permits, as failure to do so may result in legal consequences or issues with your insurance.
Additionally, if you are planning to connect your solar panels to the grid, you will need to check with your utility company to see if they require any paperwork or approvals. This may include an interconnection agreement, which outlines the rules and regulations for connecting your solar panels to the grid.
In some cases, there may also be paperwork required for tax incentives or rebates for installing solar panels. This may include forms to be filled out and submitted to local, state, or federal agencies.
It is important to carefully research and understand all the necessary permits and paperwork before beginning the installation process for solar panels. By doing so, you can ensure a smooth and legal installation process for your solar panel system.
5. Is it recommended to hire a professional for the installation or can I do it myself?
When deciding to install solar panels, one important consideration is whether to hire a professional or attempt the installation yourself. While it is possible to install solar panels on your own, there are several factors to consider before making a decision.
Experience and Expertise: The installation of solar panels requires specialized knowledge and skills, including knowledge of electrical wiring and structural considerations. A professional installer will have the necessary experience and expertise to ensure that the panels are properly installed and functioning correctly.
Safety: Installing solar panels involves working at heights and dealing with electricity, which can be dangerous for those without proper training. Professional installers are trained in safety protocols and have the necessary tools and equipment to complete the installation safely.
Time and Effort: Installing solar panels can be a time-consuming and physically demanding task. It involves lifting heavy panels, climbing ladders, and working on a roof. Hiring a professional will save you the time and effort required to complete the installation.
Warranty and Insurance: Professional installers often offer warranties for their work, which can provide peace of mind in case of any issues in the future. They also carry insurance, which can protect you in case of any accidents or damages during the installation process.
while it may be possible to install solar panels on your own, it is highly recommended to hire a professional for the installation. Not only will it ensure a safe and efficient installation, but it will also provide warranty and insurance coverage, saving you time and effort in the long run.
Congratulations, you have successfully installed your own solar panels and are now one step closer to a more sustainable and eco-friendly lifestyle. But your job is not done yet! Here are a few important steps to complete the installation process:
1. Connect your panels to the inverter: The inverter is responsible for converting the direct current (DC) energy from your solar panels into alternating current (AC) energy that can be used in your home. Follow the manufacturer’s instructions to connect each panel to the inverter.
2. Connect the inverter to your main electrical panel: This step requires some knowledge of electrical wiring. If you are not familiar with electrical work, it is best to hire a professional to connect the inverter to your main electrical panel.
3. Install a net meter (optional): A net meter is a special meter that measures the amount of electricity you produce and feed back into the grid. Some utility companies offer net metering programs where you can earn credits for the excess electricity you generate. If you are interested in this option, contact your utility company for more information.
4. Turn on the system and test it: Once all the connections are made, you can turn on your system and see if it is working properly. Check the inverter to make sure it is producing AC energy and monitor the net meter to see if it is measuring your energy production.
5. Register your system and apply for incentives: Depending on where you live, you may be eligible for federal, state, or local incentives for installing solar panels. Make sure to register your system and apply for these incentives to save even more money on your investment.
6. Maintain your solar panels: To ensure the longevity and maximum efficiency of your solar panels, they will require some periodic maintenance. This can include cleaning off any dirt or debris, checking for any damage, and trimming any shading trees or branches.
Now that your solar panels are installed and running, you can sit back and enjoy the benefits of renewable energy, including lower electricity bills and a reduced carbon footprint. With proper maintenance, your solar panels can last for decades, providing you with clean and free energy for years to come. So go ahead and bask in the sun’s rays, knowing that you are doing your part in creating a more sustainable future.


")


")

